Quick Breakfast for the Week


With the typical morning rush I is often difficult to make the kids a good breakfast. To get around this I stock my freezer with pancakes, waffles, and French toast. All of these can be store bought in any grocer’s freezer section, but none of them taste particularly good and are full of preservatives and empty calories.

If you do not have a counter-top electric griddle buy one, they are cheap. With this you can crank out several pancakes or French toast at a time with uniform cooking. Plus, some manufactures include changeable plates for grilling. Mine is Cuisinart brand. It can open flat so you can cook on both side in the griddle setup, or you can use the grill plates and push the top onto the food for grilling or making paninis.

Little kids need fat and cholesterol for brain development, so buttermilk and melted butter in the batter are good options. If you are not cooking for kids you can use 2% milk, or fat free milk mixed with a tablespoon of apple cider vinegar, and vegetable oil instead of the butter.

The key to success is to let the pancakes (or waffles or French toast) cool to room temperature on a cookie sheet, and then to place a small square of parchment paper in-between each pancake before sealing in a plastic freezer bag. 40 seconds in the microwave and you have a homemade, filling, and nutritious breakfast.

Mix in one bowl:

  • 1 diced granny smith apple (or blueberries, or peaches, or nectarines)
  • 1 ½ C. all purpose flour
  • ¼ C. whole wheat flour
  • 1 ½ C. rolled oats (not quick cook)
  • ¼ C. dark brown sugar
  • 1 Tbl. Baking powder
  • ¼ tsp. kosher salt

Mix in another bowl:

  • 2 eggs
  • 2 C. buttermilk
  • 3 Tbl. Melted butter

Pour the wet ingredients onto the dry ingredients and stir just until they are combined. Some lumps are ok.

If using a griddle, set the temperature to 350. Lightly grease the surface with butter. Ladle in the batter to the size pancake you want. Once the edges start to firm and there are bubbles on the surface flip them over until the other side is golden brown. Serve now, or cool and freezer for later in the week.
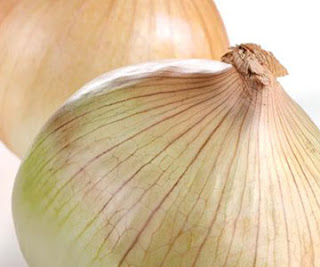

French Onion Soup


  • 5 large onions, white or yellow

  • 5 cloves garlic, chopper

  • 1 cardamon pod

  • ½ tsp toasted caraway seeds

  • 8 juniper berries

  • ¼ C balsamic vinegar

  • 2 quarts beef stock

  • 2 Tbl Kosher Salt

  • Fresh ground black pepper

  • Crusty bread slices that have been toasted (stale bread is ideal)

  • "Good” stinky gruyere or fontina cheese

Caramelization is the key to flavor! The trick to making a good French onion soup is to slowly caramelize the onions until they are a deep mahogany brown.

Toast the caraway seeds in a dry sauté pan just until they release their oils and become fragrant. Cool to room temperature. Grind the caraway seeds with the cardamom pod and juniper berries. Use an electric grinder or mortar and pestle (as I do). Set aside.

Peel each onion, cut off the tops and bottoms, and cut in half. Slice each half onion into 1/8 inch slices. In a pre-heated heavy bottom pot, preferably cast iron enameled, on high heat add the sliced onions with a little olive oil. Keep stirring the onions with a wooden spoon. They will not start to brown until all of their liquid has been released and evaporated. Once they start to brown keep stirring more frequently and work loose the brown bits that thick to the bottom (the French call the brown bits “fond”). After some color has started on all of the onions deglaze the pot with the vinegar and about ½ cup of the stock. Really scrape the bottom of the pot to dissolve the “fond”. After the stock has evaporated add a touch more oil and repeat the caramelize/deglaze process until the onions are a rich deep brown. This process could take up to an hour but the results are worth the wait.

Add the garlic and spice mixture and stir for another minute. Add the remaining beef stock, and few twists of pepper and salt to taste. Simmer for about 45 minutes.

To finish and serve, ladle the soup into an oven proof bowl. Add a slice of the toasted bread and top with the cheese. Stick in the broiler until the cheese is bubbly and slightly browned. Enjoy.

The Best Italian Beef


Everyone in Chicago loves an Italian Beef sandwich, but hardly anyone has ever had a good one, let alone a great one. Even the most highly recommended places are hit or miss and sometimes the meat can be grainy because it was cooked too quickly. The best Italian Beef is quick, easy, and made at home.


Ingredients


  • 3 lb beef roast, top round preferred

  • Kosher salt

  • Black pepper, freshly ground fine

  • Dried oregano

  • Garlic powder or about 6 cloves fresh *

  • Red pepper flakes (optional)

  • 2-3 cups beef broth

  • 2 Tbl. sliced Pepperoncini peppers with additional 2 oz of liquid from the jar

  • 4 bell peppers (all red, all green, colored mix – it doesn’t matter), seeded and sliced into 8 strips each.

  • Freshly baked French bread

* A note on the garlic: If you are going to use fresh garlic take each clove, slice it in half lengthwise, and then slice each half into 4 long slices. You will have to cut a narrow slit into the beef about each inch and slip a piece of garlic in. It’s a pain and time consuming, but well worth the effort.

Prep The Meat:
If using fresh garlic, prepare as above now. Sprinkle all sides of the meat liberally with Kosher salt, fresh ground black pepper, garlic powder (if not using fresh), and dried oregano.

Cook It:
On the stove top, preheat a large roasting pan (make sure it can be used on a stovetop). When hot, all a little olive oil and sear the meat on all side. Really get good caramelization on all sides; this is the key to flavor! When all side are well browned remove the meat to a tray.


Turn the heat to low and deglaze the roasting pan with 2 cups of beef broth. Using a spoon scrape up all of the brown bits that stuck to the bottom. Add the red pepper flakes, if desired, the pepperoncini peppers, and the pepperoncini liquid (top secret ingredient!).

Add the meat back into the pan and cover the roasting pan with a lid or foil.

Roast at 300 degrees for about 1 hour or so. Check with a meat thermometer and pull out of the over and pan at 140 degrees (medium rare). Once the meat is out, let it cool down to room temperature. Most recipes will tell you to cook at a higher temperature, but that is because they do not sear the meat first. The slow cooking after searing will develop a much deeper flavor. Keeping the foil tightly sealed around the pan will keep the meat tender and moist.

Slicing:
Not many homes have a meat slicer; if you do slice it thin. If you are going to slice in by hand, as I do, use a very thin and very sharp slicing knife. Mine is about a 1” thick blade, about 12” long, with “scallops” cut into the slides of the blade. You do not want a short blade that is going to require a lot of sawing, and do not want to use a serrated edge that will shred the meat.

Usually the roast will be made of several different muscles. Try to remove each muscle and slice individually. This will make it easier to handle and will give you an easier time figuring out “the grain” pattern. Always slice against the grain. If you don’t, even the thinnest slices will be tough to chew.

Finishing:
Throw the sliced beef into the roasting pan with the liquid and peppers. Throw in any juices that came out of the beef as it was resting. Turn the heat back on and bring to a simmer. Make each sandwich with a couple spoonfuls of the liquid on the bread, then pile on the beef, peppers, and pepperoncini.

Peanut Butter Nutty Cookies


Here is a simple and quick cookie recipe that the kids love making and eating.

Ingredients:


2 C. All purpose flour
½ tsp. baking powder
¼ tsp. salt
2 sticks unsalted butter
1-1/4 C. sugar
1-1/4 C. dark brown sugar
3 eggs
1 tsp. pure vanilla extract
1 tsp. almond extract
1 C. chunky peanut butter
½ C. chocolate chips
½ C. peanut butter chips
½ C. toasted and chopped pecans
½ C. toasted and chopped walnuts

How to:


  • Preheat the oven to 300 degrees


  • In a bowl mix together the flour, baking powder, and salt.
    Using a “Kitchen-Aid” or hand-held mixer cream the sugars and butter until it is really smooth.


  • Add the peanut butter, eggs, and extracts. Mix until smooth while scraping down the sides of the bowl.


  • Add the flour mixture all at once and mix on low until almost combined.


  • Add the nuts and chips and mix until just combined. Don’t over mix.The dough will be really loose!


  • Spoon a line of the dough about 1-1/2 inches in diameter on the length of a sheet of parchment paper. Roll the paper around the dough to form a long cylinder. Pull the dough tight in the paper to form a compact uniform shape. Twist the ends of the paper to further compact the dough. Place in the refrigerator for about 30 minutes until the dough hardens a little.


  • When the dough is chilled, slice the cylinder into ½ inch thick pucks. Place on an ungreased baking sheet about 1-1/2 inches apart. Bake for about 20 minutes turning the pan once. Cook just until the ends start to turn golden. Remove from the oven and transfer to a wire rack to cool.

Braised Cornish Game Hen


The Rock Cornish Game Hen is believed to be, a cross breed between the White Rock hen and Cornish hen, to produce a mostly white meat single serving "chicken". These are available year round in the grocer’s freezer section. Tyson makes a delicious “all natural” version with no hormones or antibiotics added.

Ingredients:

  • 1 game hen per adult serving
  • Garlic powder
  • 1 sprig fresh rosemary, leaves removed from the stem
  • 1 small lemon slices, about ¼” thick each
  • Bay leaf
  • 1 ½ cups chicken stock
  • Salt and pepper

Prep:
On a cutting board using a “Chef’s” knife, cut through the breast bone and collar bones to “butterfly the bird, but do not cut through the back. Sprinkle each side with salt, fresh ground black pepper, garlic powder, and fresh rosemary.

Cook:
Preheat a large sauté pan over medium-high heat. Add a little olive oil. Add the game hen, breast side down, and let it sear to a golden brown. Flip it over using tongs and sear the backside. If cooking more than one bird, transfer the seared bird to an oven-proof baking dish or shallow roasting pan. Continue searing other birds. Arrange two lemon slices on each bird. Deglaze the pan with the chicken stock and bay leaf making sure to work loose the “brown bits” stuck to the bottom. Pour over the hens, cover tightly with foil, and place into a preheated 350 degree oven for 50 minutes. Let rest for 10 minutes before serving.