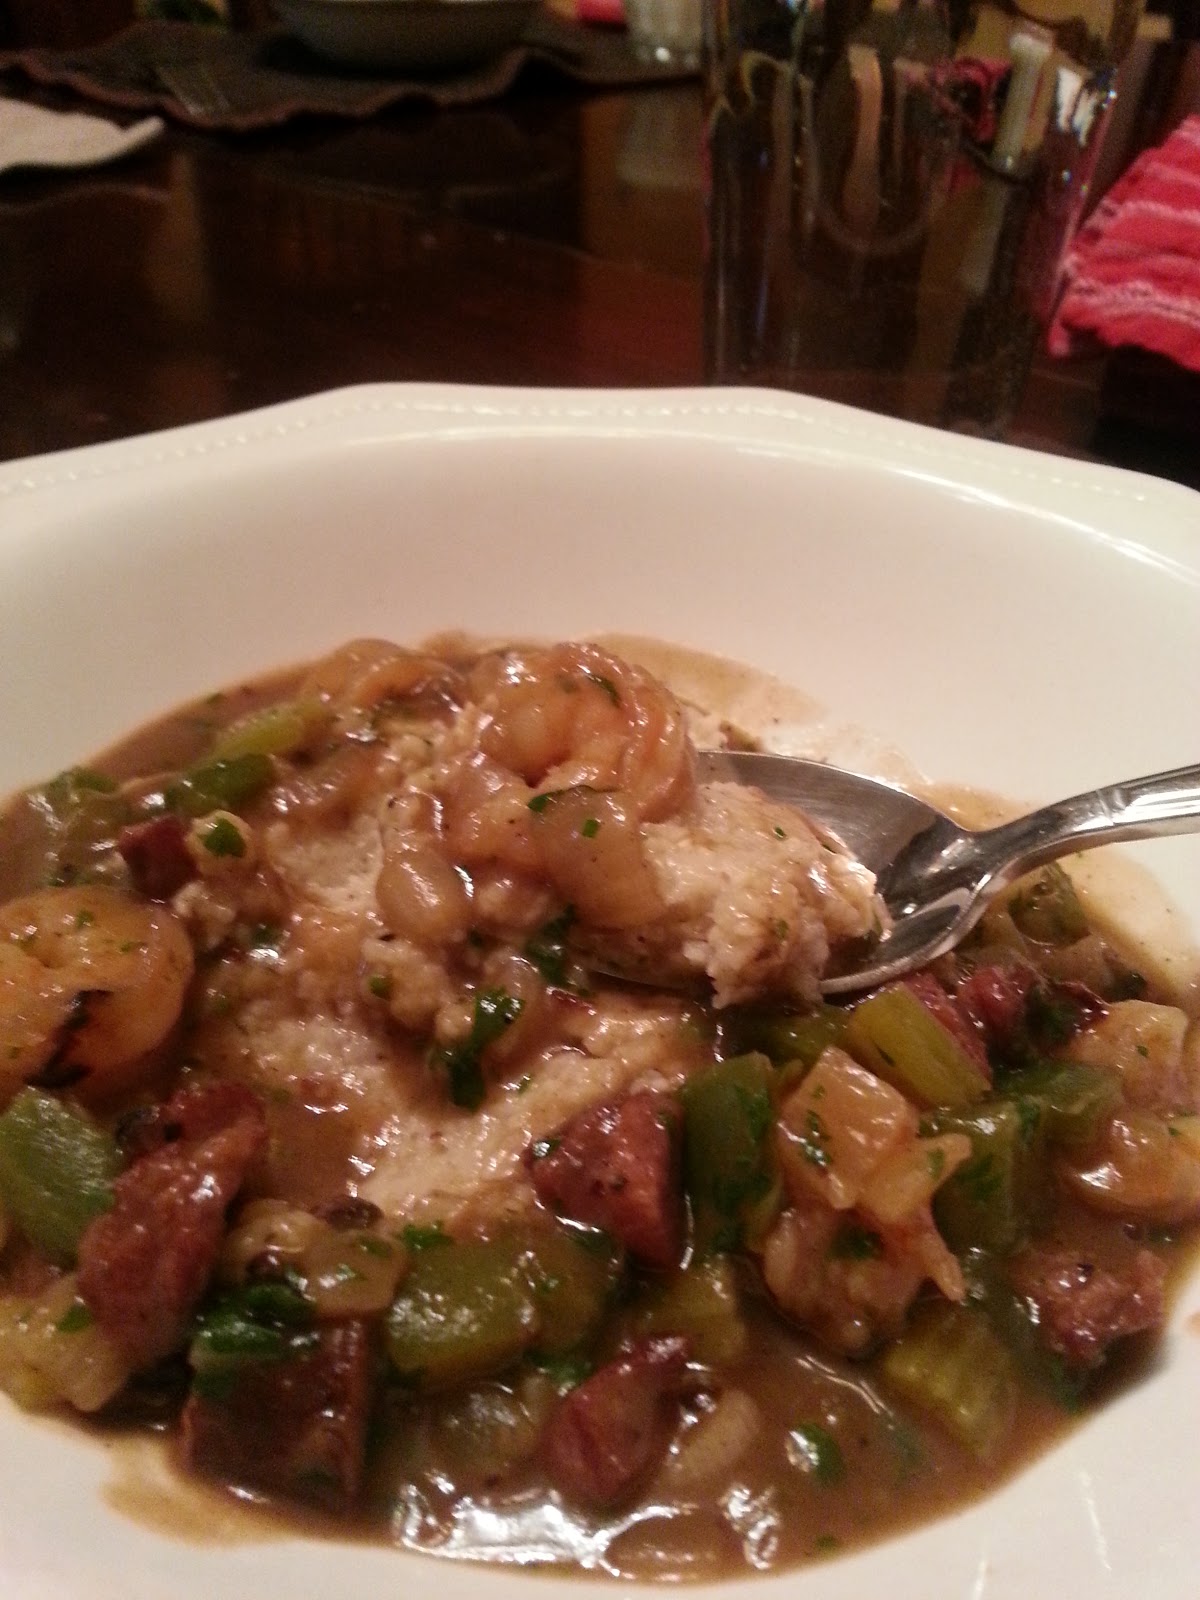
Shrimp Etouffee

I’m a fan of good food. It doesn’t always have to be a beautifully constructed dish of 40 exotic ingredients with many polar opposite attractions. Sometimes down n’ dirty cooking, simple technique, big flavor is what is needed.
This recipe came from my friend Tarpon, NW of New Orleans. This is the family recipe handed down from generation to generation on his wife’s side. This recipe is so old I told my daughter that one of Tarpon’s relatives is actually a gator (may be true). This is exactly what the doctor ordered!
Usually this is served on a bed of rice, but Tarpon confessed that Mrs Tarpon will sometimes put the rice and etouffee in a flaky crust pie (Mad genius). Will try that next.
·         2 lbs. shrimp, peeled and deveined
·         Stick butter
·         2 large onions, diced
·         2 stalks celery, diced
·         2 cloves garlic, minced
·         1 green bell pepper, diced
·         2 tsp. salt
·         ¼ tsp. black pepper
·         ¼ tsp. pink peppercorns, crushed
·         ½ tsp. garlic powder
·         ¼ tsp. onion powder
·         1 Tbl. Oregano
·         4 Tbl. Flour
·         2 C chicken stock
·         2 stalks green onion, sliced
·         8 oz fresh mushrooms, diced
·         ¼ C fresh cilantro, chopped
Melt butter and slowly cook the trinity (onion, celery, and bell pepper) until the onion is translucent.
Add all of the spices and cook for 1 minute then add the shrimp.
Stir in the flour and cook for 3-5 minutes
Add the chicken stock (slowly while stirring to avoid lumps), mushroom, cilantro, and green onion
Simmer for about 10-15 minutes; just until it is thickened.
Serve in a bowl on white rice and top with all the Louisianna Hot Sauce you can handle. 
Life is good.

Glazed Ham

The best tasting animal, in my opinion, is the duck. However, aside from pan roasted breast with crispy skin, foie gras, Peking from Chinatown, and confit of leg, there isn’t much. Now a pig, that’s a whole other ballgame. Endless cuts, cooking techniques, and textures. Who can argue the greatness of a ham, whether it’s boiled and sliced and served with braised shoulder, pickles, and mustard in a Panini press, or artery clogging bacony goodness? Pork is king.

This was my glazed ham from this year’s Christmas Eve dinner; a true labor of love.  Here is the overview:
  1. Make the brine
  2. Cool the brine
  3. Brine for 3 days
  4. Inject brine into ham and brine again for 7 more days
  5. Air dry for 1 day 
  6. Smoke
  7. Glaze (Prepare it the day before)
  8. Feast
For the brine:
  • About a 9 lb, bone-in, fresh uncured ham (shank end if possible), with most of the fat trimmed 
  • 1 C dark brown sugar 
  • 1 C Morton Canning and Pickling Salt 
  • 1 oz “pink salt” (Prague Powder #1) 
  • 1 Tbl. Whole cloves 
  • 1 head garlic, sliced in half 
  • 1 Tbl. Black peppercorns 
  • 6 bay leaves
Combine everything with about a gallon of water and bring to a boil stirring to dissolve. Let cool. Place in refrigerator overnight. Add the whole ham to the pot of COLD brine. Add a little water if needed until it is fully submerged. TIP – you can add a plate or two on top of the ham to help keep it under. Cover the pot and place in the fried for 3 days. After three days, pull the ham out of the brine and use an injector to generously inject brine directly into the thickest part of the ham. Make sure to inject all along the bone. When you got everything, place the ham back in the pot, cover the pot, and return to the fridge for another 7 days.

Air Dry:
After a total of 10 days in the brine, pull the ham out and place on a clean towel, in a pan, and let it sit uncovered in the fridge for 24 hours. The purpose of this is for the skin to dry out so the smoke can better permeate the meat.

Smoke:
Set up your smoker for about 150 degrees. I used lump hardwood with a nice log of green apple wood for smoke. If the fat was nicely trimmed I don’t think a drip pan is needed, but a water pan may help to regulate the temp. You know your smoker (hopefully). You want to aim for a temp of 130 degrees to start basting on the glaze, and a final temperature of 140 degrees.

The Glaze (prepare the day before):
  • ½ C Inner Beauty Hot Sauce (see proceeding entry)
  • 1 Tbl. Brown sugar
  • ¼ C buckwheat honey
  • ¼ C orange juice
Bring to a boil while stirring just to dissolve the sugar. Let cool and let sit overnight.
Baste the glaze onto the ham about every 10-15 minutes from 130 to 140 degrees. When the finished temp is reached pull the ham and let it rest UNMOLESTED for at least 20 minutes. Slice and bask in the glory that is ham.

Authentic Inner Beauty

While this is not an original recipe, I feel the need to document it here since it is the original, and no longer made, version of Inner Beauty hot sauce. Inner Beauty was a mustard base Jamaican style hot sauce that I use to buy by the case. When it was no longer available in stores, I purchased every bottle I could online.

Then the dark ages came, no Inner Beauty anywhere. I scoured the Internet with a handful of dedicated fanatics for years. One day, I found an interview online with the original maker Chris Schlesinger (mad genius!). Attached to the article was a picture, snapped with a cell phone, of the original hand written recipe that was framed on the creator's wall.

Here is the original version, followed by a scaled down version.

The Historic Original Inner Beauty Hot Sauce Recipe
(courtesy Chris Schlesinger, East Coast Grill)
  • 5 lb scotch bonnet or habanero peppers
  • 1 gallon yellow mustard
  • 1/2 lb brown sugar
  • 1 quart orange juice
  • 1/2 gallon white vinegar
  • 1 cup honey
  • 1 cup molasses
  • 46 oz. papaya juice
  • 46 oz. pineapple juice
  • 1/2 gallon peanut oil
  • 6 oz. each of cumin, chili, curry, tumeric
  • 2 oz. all spice
  • salt and pepper
The Home Style Inner Beauty Hot Sauce Recipe
(courtesy Chris Schlesinger, from Big Flavors of the Hot Sun)
  • 12 to 15 scotch bonnet or habanero peppers, roughly chopped
  • 1 ripe mango, peeled, pitted and mashed
  • 1 cup cheap yellow prepared mustard
  • 1/4 cup packed brown sugar
  • 1/4 cup white vinegar
  • 1 tablespoon prepared curry powder
  • 1 tablespoon ground cumin
  • 1 tablespoon chili powder
  • 1 cup molasses
  • salt and fresh cracked black pepper to taste

Cajun Shrimp n' Grits

So satisfying on a winter night with a beer and can be made quickly.

Grits:
• 1 large shallots, minced
• 3 cloves garlic, minced
• 1 tsp oregano
• 2 oz white wine
• 1 C. “quick cook” white corn meal grits
• 1 ½ C chicken stock (plus a little more to adjust consistency)
• ¾ C cream
• 2 Tbl butter
• ¼ C grated parmesan cheese (to the French and Italian "purists" that say you don't add cheese to a seafood dish...get lost)

On medium heat, sweat onions in olive oil until translucent. Add garlic and stir 1 minute. Add oregano and stir 1 minute. Crank the heat, add the wine, and cook until wine is evaporated. Add cream and chicken stock and bring to a boil. Slowly whisk in the grits. Turn the flame down to a simmer, add the salt and pepper, and stir every few minutes. The grits will thicken over time. Just before serving, add the cheese and butter and adjust the thickness with more stock.

Shrimp:
• 8 oz Andouille sausage
• 1 medium onion, diced
• 3 ribs celery, diced
• 2 green bell peppers, diced
• 3 large cloves of garlic, mashed
• 2 tsp Cajun seasoning
• 1 tsp salt
• ½ tsp black pepper
• 4 Tbl butter
• ¼ C flour
• 1 Q chicken stock
• 1 lb. small cleaned shrimp
• ½ C parsley, chopped
• Cayenne pepper, or hot sauce to taste

In a heavy bottom pot, BURN the Andouille on all sides, in olive oil then remove. Sauté the onion, celery, and bell pepper (holy trinity) then remove. Chop the Andouille into small pieces. Melt the butter then add the flour. Stir constantly with a wooden spoon over medium heat until the roux is medium brown. Add the garlic, salt, pepper, and Cajun seasoning and stir for one minute. Add the chopped Andouille and trinity and stir until everything is coated with the roux. Slowly add the chicken stock while stirring to avoid lumps. Bring to a boil. Reduce heat and simmer for 10 minutes. Add the shrimp and simmer just until the shrimp is cooked (3-4 minutes). Add the parsley, adjust seasoning, and add more chicken stock if it is too thick.

To Serve: Spoon a pile of the Grits in the center of a bowl. Ladle the shrimp around the grits. Enjoy.

French Fries


Not much is better than the classic French fry; fluffy on the inside, crisp on the outside, and just the right amount of salt. Sure, you can go to McDonalds for a very good fry, but nothing will beat homemade if it is done properly, and it doesn’t take long at all.

Keys to the perfect fry:


  • The cooking vessel – a deep fryer or deep pot, preferably cast iron to retain the heat.

  • Frying medium – peanut oil or lard, or a blend of the two.

  • The spud – Idaho. Lots of starch, low moisture, and just enough natural sugars to get golden brown.

  • Proper blanching

  • Correct size batches

  • Salt – kosher. No substitutions

The secrets – see the last sentence

If you do not have deep fryer use a heavy pot. A heavy cast iron pot will distribute the heat evenly and help to maintain the temperature when cold potatoes are added.

Use peanut oil for its high smoking point. For better flavor use lard (remember when McDonalds used lard?) To compromise between cholesterol and flavor you can blend the two in equal proportions. Do not overfill the pot as doing so will cause splattering, burns, a possible fire, and a huge mess. Usually no more than half full is good.

When cutting the potatoes leave the skin on. It adds flavor and texture. You should wash and scrub the potatoes to get the dirt off, but make sure to dry them thoroughly.Cut the fires all uniformly (same width and thickness). Doing so will ensure that they cook evenly.

Work in small batches. Adding too many fries into the basket will cause a rapid drop in the oil’s temperature which will lead to oil absorption and a soggy fry.

Start with your fry oil at 325 degrees. At this temperature we only want to cook the potato, to soften it. When a batch of fries is flexible (not falling apart) remove them from the oil, shake off the excess grease, and spread them out on a layer or two of paper towels on a sheet pan. When all batches have been properly blanched and cooled to room temperature, turn up the heat on the fryer to reach 375 degrees.

Again, working in small batches, cook the blanched fries until they are golden brown. Cooking the fries a second time at a higher temperature will cause the inside of the potato to get fluffy on the inside while crisping the outside quickly. Remember sugar will caramelize at 320 degrees; using a higher temperature will get the desired color results quickly. When the batch is done drain it and put on an unlined (no paper towel) sheet pan and sprinkle with kosher salt. Keep in a warm oven while working the other batches.

When finished they will be the best fries ever. To take it to a new level consider doing one of the following:
Sprinkle with grated parmesan cheese
A light sprinkle of granulated garlic
a light drizzle of clarified duck fat (my favorite)

Backyard Meat Smoker


Back in 1995 I need a vacation from the 70 hour week weeks of being a new line cook. A friend, quite strange actually, was an avid police car enthusiast and was heading in a convoy to Eureka Springs, Arkansas to the National Police Car Owners of America annual convention. With nothing else to do I decided to tag along.

Eureka Springs is not too far south into the state, but the geographic layout is stunning. There are lots of very narrow winding hilly roads that seem to tempt the driver to roll off into a deep gorge. As we approach the top of one hill on a particularly straight patch of road the smell of BBQ was overpowering, in a good way. As the headed down the other side of the hill, in the distance, you could see the source of the intoxicating hickory fumes.

Some foodie, from Chicago, relocated to Eureka Springs and opened a BBQ place. Instead of building his smoker near the restaurant as most sane people would do, he built his just off the road, about 300 feet from the front door. Why you ask, pure marketing brilliance. The smoke was carried up the hill by the breeze and every car that came down that road couldn’t help but stop. We happened to see the owner/chef rolling a large cart full of briskets, ribs, and pork shoulders as we pulled in. I don’t think it’s possible to drive past without stopping.

The smoker that he built was ugly, but huge, about the size of a tool shed. The whole key to smoking meat is to control the air flow. To much air flow within the vessel will fuel the fire and cause the temperature to rise, cooking tough cuts of meat too quickly to properly and thoroughly break down the tough collagen and connective tissues. To little air flow and the food will be kept in the “food danger zone” temperature-wise and risk harmful bacteria growth.

I wanted a smoker for a long time to make ribs, pulled pork, brisket, and sausages. Charcoal, electric, propane, or pellet fed? That was the million dollar question. Prices can vary from $150 for a small cheap electric model to many thousands for a well insulated pretty stainless steel wood burning model. Each fuel source has its advantages: efficiency, ease of use, temperature control, etc.

After going back and forth, driving my wife crazy, I decided on the cheapest and most proven smoker, the UDS. UDS stands for “ugly drum smoker” and is made from a steel drum. I made mine for about $60. I bought a new, unlined, open top 55 gallon steel drum from a local barrel company for $30. The cooking grate, a standard 22.5 inch Weber replacement grate, bought at the end of the season for about $7. The other needed hardware was a handful of bolts, nuts, and washers, a thermometer, a few metal handles, and a piece of expanded sheet metal to fabricate the charcoal basket onto a small cooking grate. To control the air flow I bought two 2” threaded metal “nipples” with caps and two 3/4” ball valves. By uncapping the nipples and tweaking the ball valves, the temperature can be easily controlled and held to a constant. My daughters helped to drill the holes and insert all of the bolts, washers, and nuts. A good time had by all.

After an initial burn of lump hardwood charcoal to season the grill, the initial BBQ test was beef brisket. I rubbed the brisket with a Texas inspired dry rub and smoked it for about 5 hours at 220 degrees. The result was incredible! The meat was absolutely juice and tender and was served with a thin tangy cider vinegar BBQ dipping sauce.

Life is good.

Hog Butchering

Wow, it’s been awhile. It isn’t that I haven’t been cooking and teaching cooking to my daughters, quite the opposite. It’s just that I started this blog for me without knowing if anyone ever read it. Then I shared it with family. It isn’t like I received criticism, quite the opposite. But after that I lost interest. Now that fall is coming and that I’ve been uniquely busy I feel the need to start again.


One of the things I really care about is knowing where my food comes from, especially animal products. For the past five years I have been buying beef, pork, and lamb from a family member that raises livestock naturally. He can’t call it organic because of the very specific requirements as stated by the Oregon Tilth, the only seal, stamp, or “verbiage” that has any meaning. Don’t buy into the labels that say all natural, local, cage free, or free-range, to name a few.


Know where your food comes from. The meat I buy is living outdoors. The hogs are a breed of Berkshire (for fat and flavor) and Durock (for body type). The pigs are quite happy roaming around through the woods and rooting for nuts and other things that pigs eat naturally. They walk on the ground not on a metal platform. The get sunshine, not artificial and UV lighting. The get fresh air not gross air circulated through a huge CFO (concentrated feeding organization).


The flavor of this pork is amazing. It actually tastes like something. You can see the different colors of the muscles from exercise and eating iron rich grasses. The only downside, if there is one, is only slight, and that is that the animals are naturally leaner (hence the need to cross breed with a fatty Berkshire). If a chop is cut too thin it will dry out a little before you can get the nice caramelization that enhances the natural flavors.


When my cousin contacted me late last year stating that 2011 pricing was going to increase because of rising costs for corn (damn ethanol!) and fuel I opted to buy half a hog and a hind-quarter of grass-fed beef at locked-in 2010 pricing. I only had to wait for July or August for the animals to be ready.


Now, I could have had my cousins processor butcher the hog as they do for all other customers, with set weights for chops and such, but that is not good enough. As I stated, a thinner chop from one of these hogs can dry out quickly. I offered to drive directly to the processor to pick up the hog and beef whole. Aside for paying for the animal’s weight I was only going to have to pay the processor their $14 fee for the slaughter. No butchering fees. No delivery fees. And I know that the animal is fresh as can be. It was only slaughtered the day before. You can’t get fresher than that unless you kill it yourself. Maybe one day!


Now, I have half of a hog on my butcher block table and need to decide what to do with it. With a brand new 19” bone saw, a butcher knife, a cleaver, a boning knife, a ball of kitchen string, and my vacuum sealer I’m ready!


There are essentially only three “primal” sections to a hog: the shoulder, the loin, and the ham (rear leg).


From the shoulder:


  • The shank (forearm) – leave it whole and braise it or even deep fry it for amazing crispy cracklin’ goodness.


  • The picnic – a group of muscles with good fat percentage for juice roasts.


  • The butt (not from the ham area as you would think) – this group of fatty muscles has the ideal protein to fat ratio for making sausages, which is exactly what I’m going to do with it.


The loin:


  • Belly – homemade bacon. Need I say more?


  • Spareribs – off the belly


  • Baby back ribs – off the back side, naturally


  • Boneless chops – technically a chop has a bone, but I’m cutting these babies thick so chop is more accurate than saying “cutlet”


  • Chops – I’ll be cutting the standard chop as well as utilizing the tenderloin for some “T-Bones”.


The ham:


  • I’m not set up for curing (yet) so making a traditional ham is out. Instead, I’ll break the leg into the various muscles and tie up roasts.

Cutting the hog myself means very little scraps that would normally be sold as ground pork. Most of this is just trimmings from roasts to make them more uniform and from scaping the bones, and the lovely cheeks and jowels from the head. I’ll also take the “fat back” area and cure it for homemade salt pork.


Much more on this little piggy as he goes into my belly.